

4 Simple DIY Home Repairs For Any Experience Level
Whether you are buying a new home for the first time or are a seasoned homeowner, the time for living under a lease is over. Gone are the days of submitting a maintenance request and waiting for your landlord to send someone over. That means you, as the primary homeowner, are now responsible for home maintenance, except for what is covered by any existing warranties.
While it can be a bummer that you can no longer say, "Let the landlord handle it," learning some simple home repair techniques can take the hassle out of menial tasks or salvage an emergency situation, while also saving time and money that would be spent on hiring a repair company.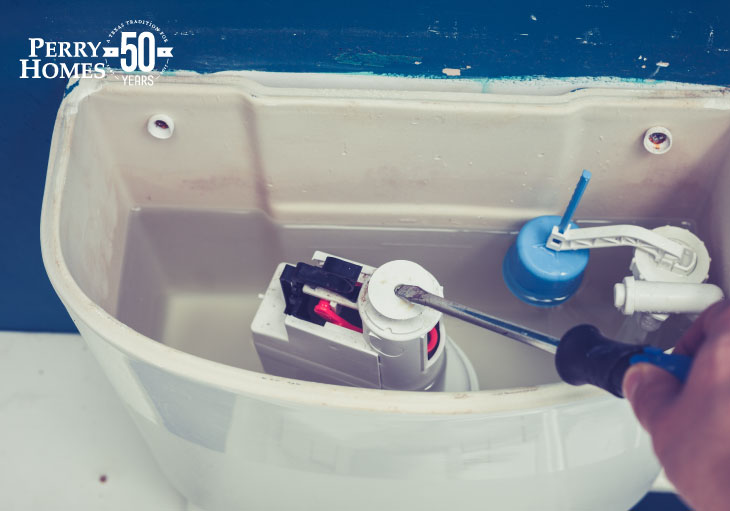
Common toilet problems
You Will Need:
- A flange plunger
- Old towels
- Replacement flapper
- Optional: food coloring
Might as well get this one out of the way first. No one likes a malfunctioning toilet. When something goes wrong, things can get dicey if you are not careful. The first step is staying calm so you can properly diagnose the problem, especially if the problem is not as obvious. The most common trouble you will run into are the dreaded clog or a running toilet.
In the case of a clogged toilet:
First, if possible, let the water settle to a normal level or, in the case of not enough water, add some fresh water into the bowl. Having an acceptable minimum water level is crucial for creating enough force to move the blockage. Since you are dealing with water, go ahead and spread some old towels around the basin and the surrounding floor in case things get out of hand.
If you do not have one already, get yourself a flange plunger. Unlike a traditional cup plunger, a flange provides better suction with a head that inserts partially in the drain itself. Make sure your plunger does not have any cracks, as they will undermine the plunger’s efficiency. Some pros even recommend coating the plunger head with petroleum jelly for an extra tight seal.
Lastly, insert the flange into the drain and push down repeatedly on the handle two or three times. Do not be afraid to put a little muscle behind it. Then try flushing to see whether the clog is dislodged. Repeat as needed.
In the event of a more stubborn clog, calling a professional may be necessary.
In the case of a running or leaky toilet:
Although common, a running toilet can be a frustrating experience. In fact, according to the Environmental Protection Agency, more than "10,000 gallons of water [is] wasted every year and ten percent of homes have leaks that waste 90 gallons or more per day." Not to mention how much your water bill could go up.
You can easily spot one by that excessive hissing sound or trickle long after a flush. If you need more certainty, do a little experiment by dropping a little food coloring in the cistern and wait and see whether any color sneaks into the bowl. If so, then you have a leak.
The first steps are taking a look inside the cistern itself. Carefully remove the lid and check the water level, specifically if the water is too high or low. Make sure the ballcock (aka ball float) is operating correctly by manually activating it and see how the water drains out. While newer models are less likely to have problems, it is still important to check them out.
If all looks well, inspect the flapper for any faults or cracks. To replace the part, simply pop it off and take it to a local hardware store and look for a comparable replacement. In general, these parts will cost less than 10 dollars. Before you replace the flapper, however, make sure you clean the area of any dirt or other grime that may be present.
Fix a sticky door
You Will Need:
- Screwdriver
- Hammer
- Wood plane
- Matching paint color
Few things can make you look more foolish than dealing with a stuck door, specifically a standard door with a door knob. Thankfully, there are few steps that you can take before calling in a pro. If you are not very handy, it may be prudent to work with a partner in order to avoid any accidents or damages. Furthermore, if you were provided a homeowner’s manual, you should consult it for repair information prior to starting your project.
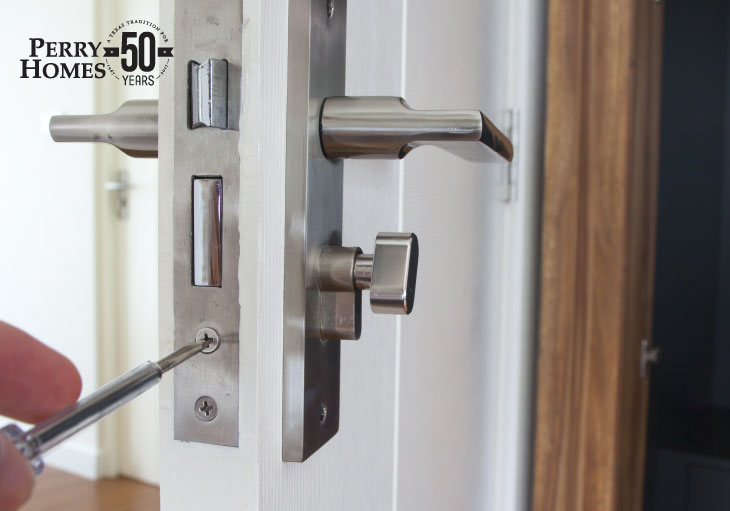
First, take note where the door may be rubbing or coming in contact with the door frame. Next, make sure all screws are nice and tight. Over time, these screws can come loose with use or, in some cases, even strip and require complete replacement. Word of caution, though: avoid overly tightening screws, as you may inadvertently strip the screws.
If all screws are tight but the door still sticks, it is time to roll up your sleeves and channel your inner-carpenter. Start by closing the door and removing it from its hinges by tapping the pins with a hammer and unscrewing all screws and hardware.
Using a wood plane, shave down the troublesome areas and check whether the door will now move freely.
If so, repaint the shaved areas with a matching wood paint, let dry, and reattach the entire door.
Replacing ugly grout
You Will Need:
- A carbide blade or grout saw
- Grout mix
- Grout sealant
- Plenty of rags
- A float or putty knife
- Vacuum or soft brush
- Painters tape
Grout, that stuff you find between tiles, can get pretty nasty over time, especially in older homes where the upkeep may have been lax. However, bad or cracked grout can happen to anyone, regardless of how old your home is.
Begin by covering your tile with the painters tape. This will help prevent scratches.
Next, carefully dig or saw out the grout by staying close to center of the line using a carbide blade or, preferably, a grout saw. Some rotary tools come with specific heads designed for grout, but these should only be used for larger areas. If you notice what looks like dust, stop immediately because you may be harming the tile. When finished, remove the remaining debris with the vacuum or brush.
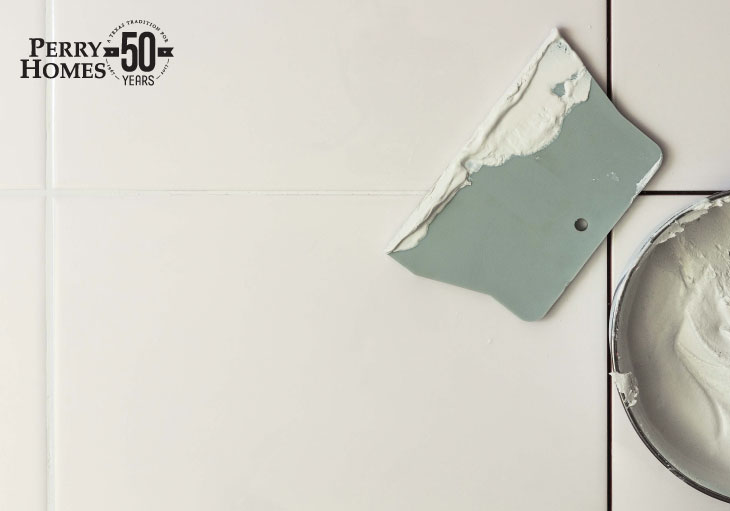
Now assemble the grout mix. For the next few steps, closely follow the manufacturer’s instructions for proper preparation. Once ready, starting from the bottom, use the putty knife or float to fill in the gaps, smooth the groove and repeat. This part requires some artistry, but do not fixate on perfection.
Clean the excess with wet rags, keeping sure not to wet the fresh grout. The grout will take about 20 minutes to dry and at least 24 hours to cure.
Lastly, once again follow the instructions for applying the sealant. Doing this step the right way is crucial for long-term effectiveness against mold and other bad news.
Repairing or patching drywall
You Will Need:
- Spackle
- Joint knife
- Optional: drywall repair kit
Lots of things can happen to your drywall. Whether it is move-in day dings, door knob damage or something more severe, thankfully most jobs are not too costly.
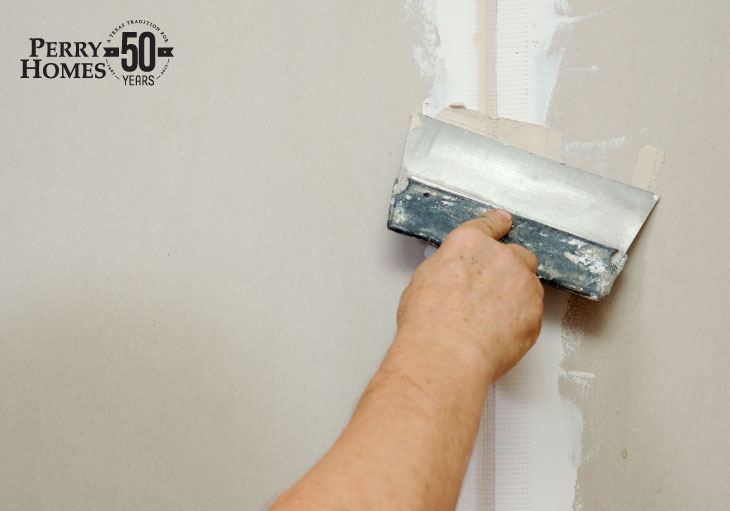
For smaller nicks and divots, smooth out the affected area with the joint knife. Then cover the areas with a bit of spackle, smooth and reapply if the hole is not entirely covered and then let dry.
For larger holes, purchase a drywall repair kit and follow those instructions. Most of the time, this will involve applying a patch over the gap and covering it with one or two coats of spackle with a joint knife and blending the new coat with the wall.
Feeling like a natural handyman now? Pass on the knowledge by sharing this post!